5 Renovation "Rules" I Broke... And Never Regretted

Earlier this week, Architectural Digest’s new sister site, Clever, ran a couple of my comments in a story about budgeting for a kitchen renovation. It got me thinking back to my own kitchen reno, which at this point is about three years old (and already starting to need a few touch-ups… thanks, kids) and some of the out-of-the-box decisions we made.

A screenshot from my book trailer, showing me in our never-this-quiet kitchen.

A screenshot from my book trailer, showing me in our never-this-quiet kitchen.

For the most part, our renovation was pretty “safe”—we didn’t take any crazy-big style swings, except in the attached powder room, and our only gratuitous, totally unnecessary splurge was spending too much on our custom range hood, a choice I’ll never regret. The putty color of our cabinetry was a departure from ubiquitous white or gray—it’s especially interesting when you see how it changes in different light—but it’s still pretty safe. We also selected traditional silhouettes and details for the cabinet doors, hardware, and lighting that would complement the 1860s architecture of our home rather than going eclectically modern. If we put the home on the market today, the style probably wouldn’t scare any open-house-goers away.  

But there are a few other moves we made that a lot of people might not have. Specifically:

1. Living at home—with kids—during the renovation.

I’ve posted about this before, but giving up your kitchen when you have toddlers is no joke. You can read about how we dealt with it here, but I’m not going to lie and say it was easy. Was it a good idea? You bet. Because if there’s anything worse than not having your kitchen with todders, it’s doing the same thing when you have relentlessly demanding school-age kids who insist on having MADE-TO-ORDER OMELETS ON A TUESDAY MORNING. They barely remember the process now.

2. Not opening up the floor plan.

It’s practically a required part of the script on HGTV these days: “We’re going to take down this waaaalllll, create some great flooowwww, just really connect this space with that one and create this amazing space for entertainingggggg….” Barf. Not once did we consider blowing out all the walls in our house to connect our kitchen, dining, and sitting rooms. Why? Because one of these days, there’s going to be a backlash against the Open Concept Avalanche of the Mid-to-Late Twenty-Teens, and frankly, I like it when old houses have a lot of small rooms. In my house, we make a mess when we cook, and I don’t want to look at that mess when we sit down with friends.

I also find that moving between rooms affects my mood in a good way. It’s casual bustle—think: simultaneous cooking, cleaning, snacking, catching up on plans—whenever we’re in the kitchen, but the dining table is generally where my family goes to focus on something, whether that’s a meal or a craft project. When we move to the front parlor, we’re usually relaxing, talking, watching funny clips on YouTube, or building a tower with Magna-Tiles. The downstairs family room is for sofa forts and movies. For me, making a home that works for modern life is about more than just knocking down walls.

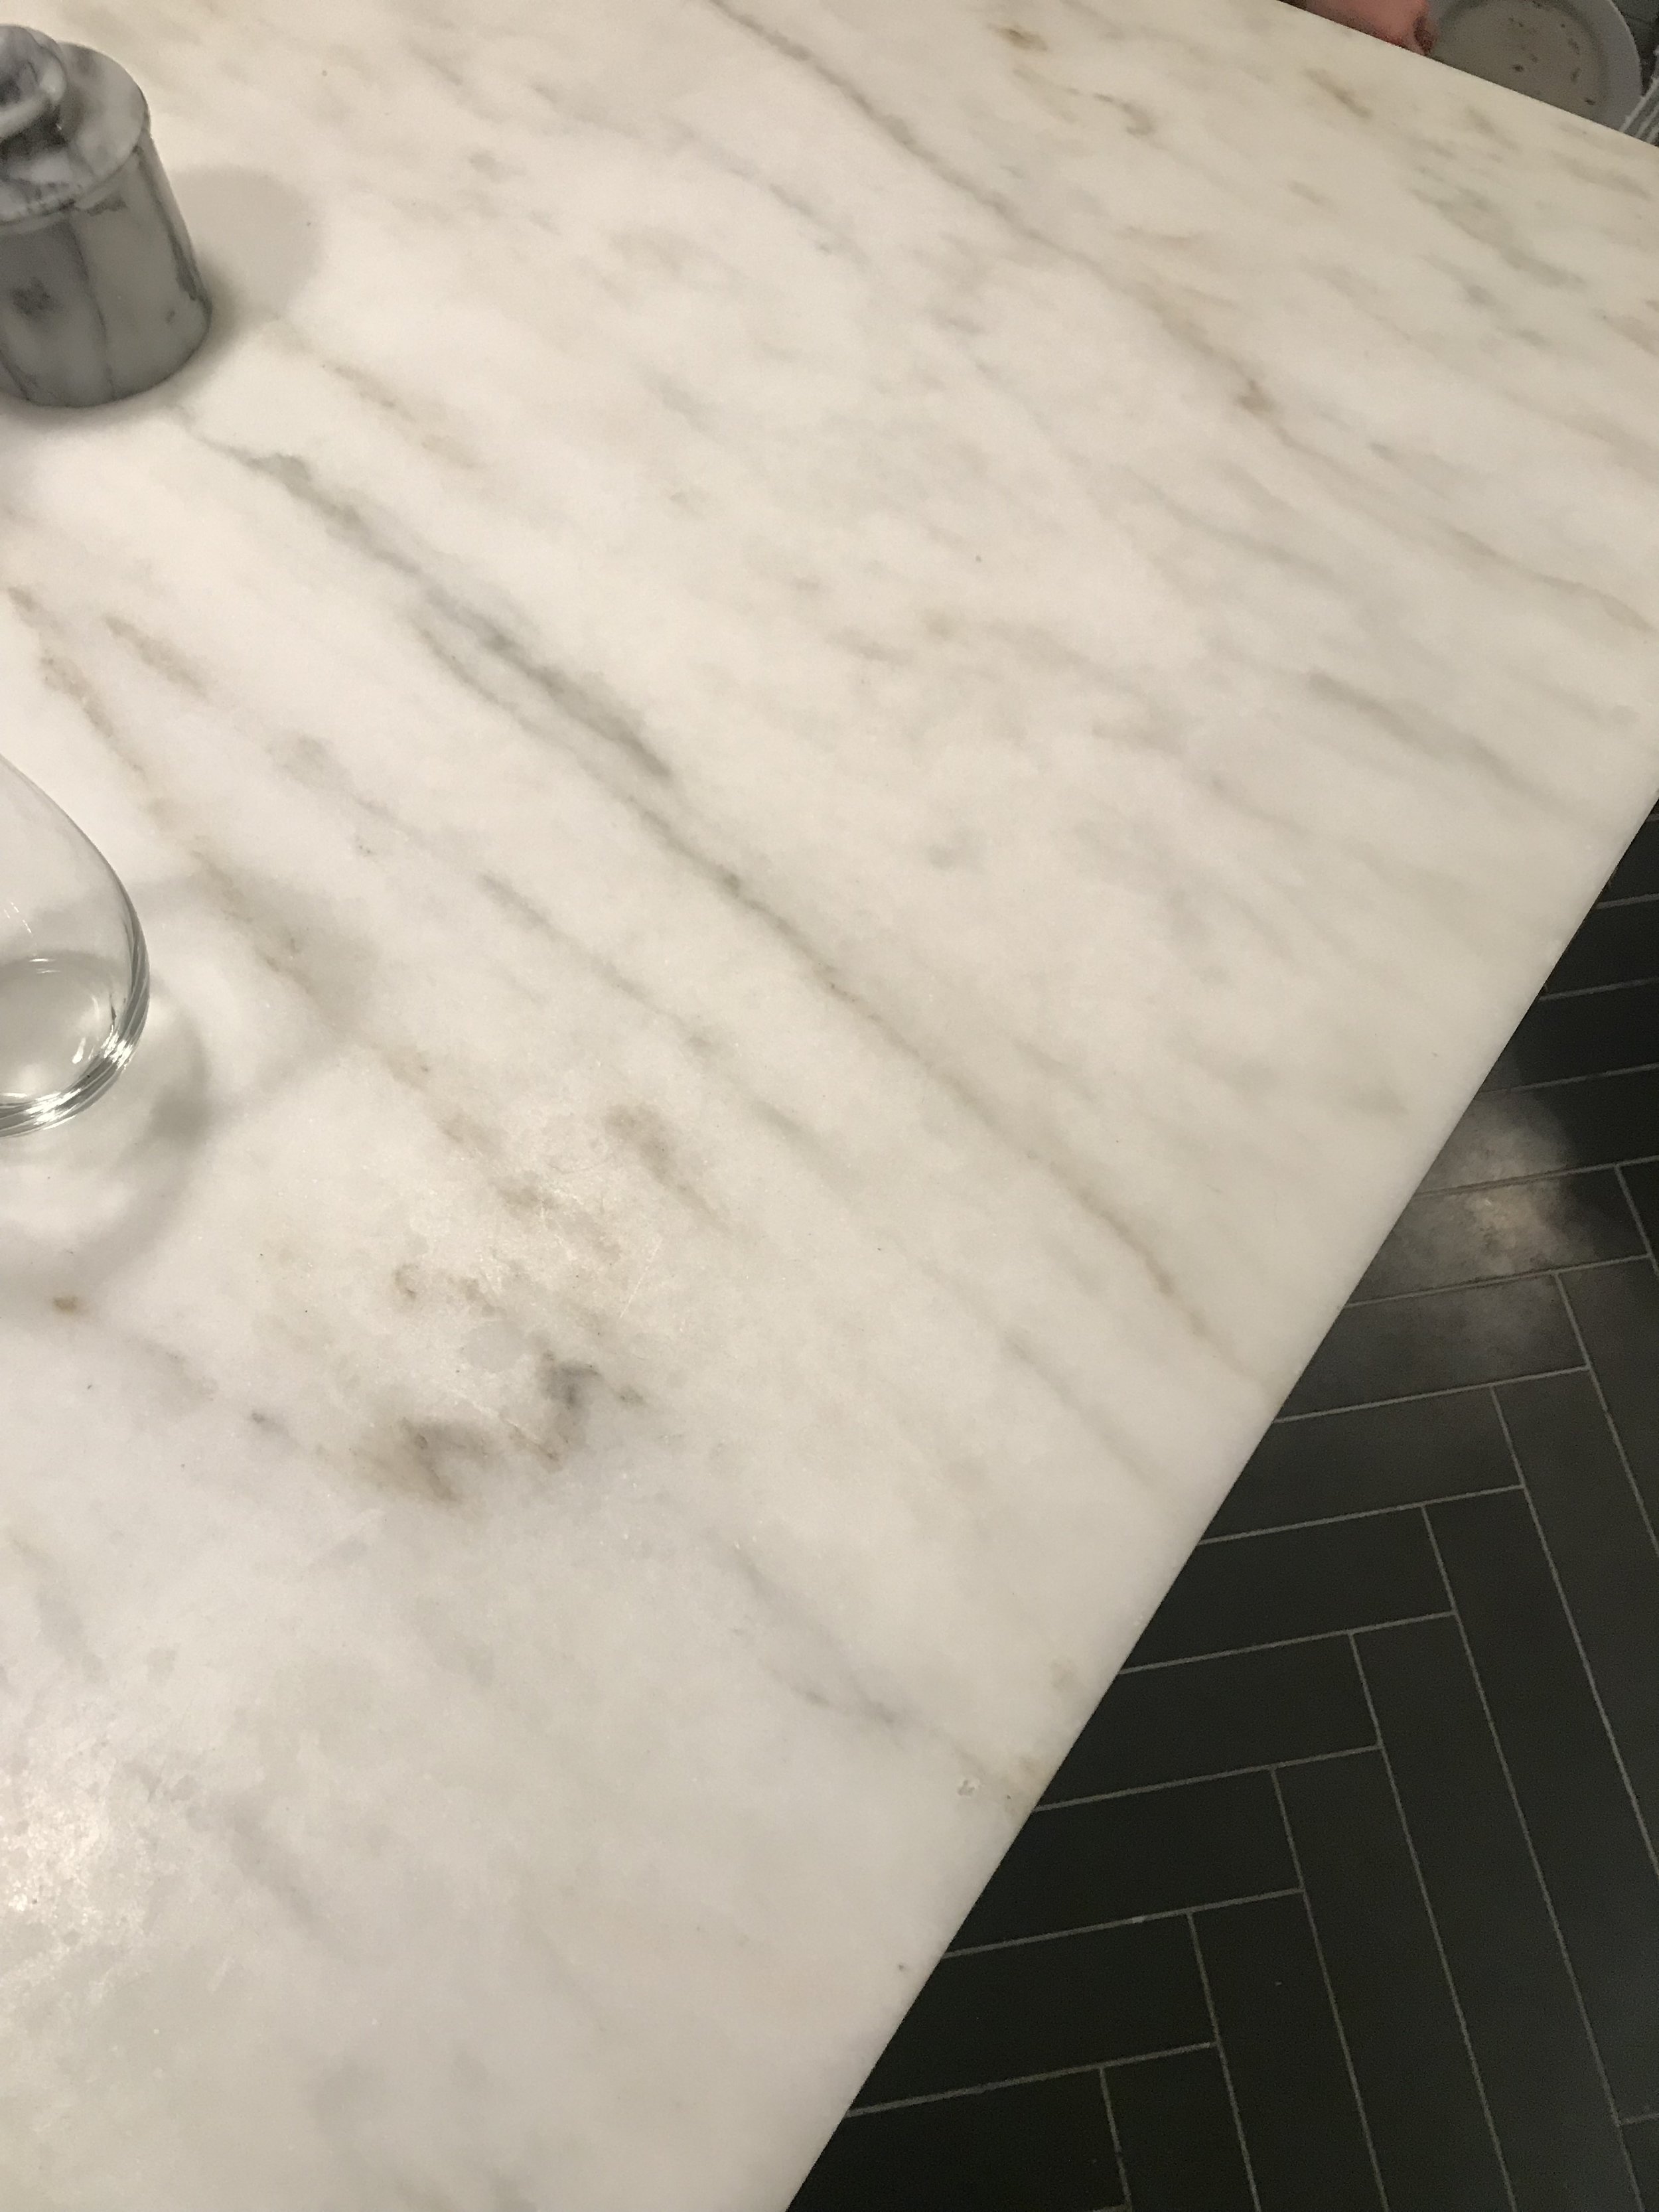
3. Choosing countertops that will chip, scratch, and stain.

Got your attention with that headline, didn’t I? But really, deciding whether or not to put in marble countertops is is a tough call for many people, and it’s the subject of one of my most popular posts. The bottom line is, we wanted a kitchen that would develop patina and character over time. If the idea of countertops that’ll show wear and tear bothers you, keep on walking. But if you basically want to live inside a vintage French brasserie, buy the marble.

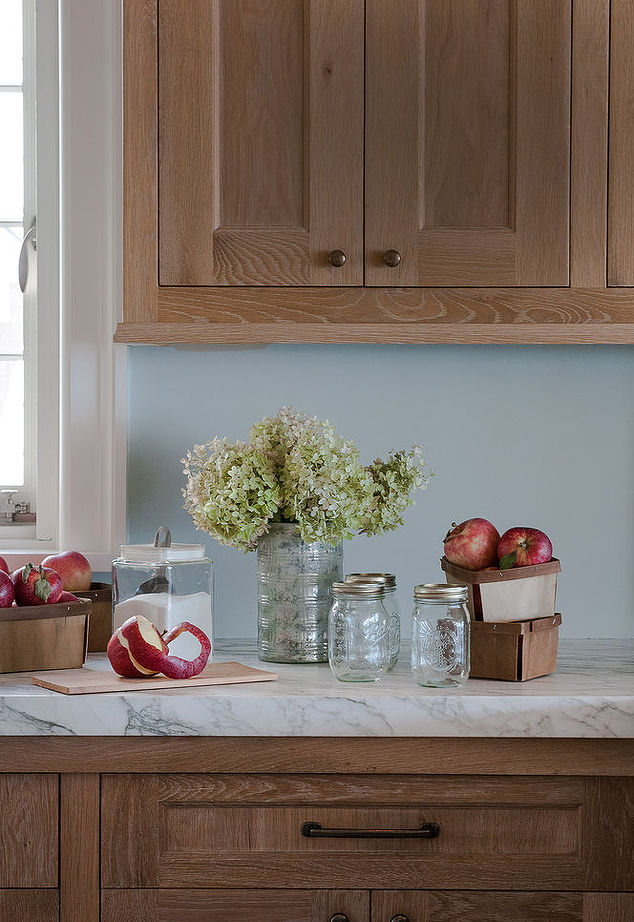
4. Not installing a backsplash (at least not right away).

You read that right. We didn’t do a backsplash. We were on a deadline, couldn’t decide what we wanted, and ended up leaving the walls bare. Eventually I put up some stick-on tiles to test out the look of a tiled wall (spoiler: it looked good enough to photograph for my book), but we STILL have to install the permanent tile that will cover the space between the counters, cabinets, and run across the whole back wall. But people still like our kitchen. We're all still alive. Everything is fine. 

5. Installing a really loud fan.

Since we didn’t previously have a powder room on our home’s first floor, we added the world’s tiniest loo just off our kitchen. The problem with putting a toilet within six feet of your kitchen island, however, is that sound travels, if you get my drift. So instead of taking our contractor’s recommendation and installing one of the new ultraquiet vent fans in the powder room, we purchased the noisiest fan we could find. “We actually want all the sones,” we told our somewhat befuddled electrician. And you know what? While the resulting auditory experience is a bit like peeing in the lavatory of a 747, everyone appreciates the LA LA LA I CAN’T HEAR YOU element of forced privacy we managed to create. It works.

What about you? Are there any “do’s” in kitchen renovations that you think are a “don’t”? Any other unconventional decisions you’ve made (or want to make)? Share in the comments below!

Honed Marble Countertops: Three Years Later

As a blogger-on-the-side, I’m constantly telling myself I’ll post more updates. And I’ve even had fun things to announce! A feature in Apartment Therapy! Another one! A mention on Architectural Digest's new site, Clever, and an interview by the Associated Press that got picked up by the New York Times! OMG.

But if I’m being real, what actually inspires me to post here is real-life design questions and challenges. And a couple of weeks ago, a guy named Bill who found me via this blog reached out to ask about my countertops. You know, the ones I posted about in 2015 and said I’d update everyone on later.

Well, Bill was curious how those honed marble countertops of mine were holding up. He was thinking of putting in honed marble in his own kitchen, and wanted to know how they actually weathered the storms of my kitchen, kids, and life. Did I still like them? Knowing what I know now, would I use the same material, or would I go with something more “durable” and less costly, like quartz?

Here’s what I told Bill. And here are some crappy pictures I took to show him exactly what I meant.

Hi Bill! I still absolutely love the marble. It has taken on some visible wear, so if you’re partial to a really immaculate look, you might not be thrilled, but personally I love the character. It’s a very European/bistro look. 

I’m trying to get a good shot of what the etching looks like right this second but you can only see it under certain light and certain angles.

FullSizeRender.jpg
IMAGE.JPG
IMAGE.JPG

Keep in mind I make zero effort to keep lemon juice/vinegar off the counters. I just deal. 

Also worth noting is the opaque marks that could appear around the sink edges if, say, your six year old throws a fish tank into the prep sink (yup).... it’s because it’s a softer stone, but again, these don’t bother me. I’d do it again!  

IMAGE.JPG
IMAGE.JPG

So there you have it. Anyone out there have honed marble countertops and NOT feel the same way I do? If your experience has been different, what did you not like about their aesthetics and durability over time? Share with me in the comments below!

xx Donna

What to Do With Brown Kitchen Cabinets

Honest question: Has any home feature been vilified more than brown cabinetry in the last fifteen years? Seriously. Watch any episode of House Hunters or any home-renovation program on TV, and you’ll see young home buyers wrinkling their noses at kitchens featuring dark wood cabinets and grayish-brown granite countertops. “I want a white, bright kitchen,” they’ll say, sneering at the glossy finishes. On Pinterest and in shelter magazines, dream kitchens in white and pale gray tones dominate the scene.

Here's why I have brown on the brain: A friend living outside Boston recently reached out to me about her own brown kitchen. She and her husband are planning to rip out the countertops, flooring, lighting, and cabinet hardware, but they can’t decide what to do about the cabinetry itself. On paper, the cabinets are are everything they want—solidly built and configured relatively well for the space. The problem is their deep chestnut color:

The pre-renovation kitchen.

The pre-renovation kitchen.

While the “she” in the party would love to paint everything a pale shade, like all of the kitchen designs she’s pinned online, he’s hesitant to sand and paint over the wood grain, which stands as evidence of the cabinets’ handmade, hardwood construction.  

It got me thinking: Is it possible that brown kitchens have gotten a bad rap? Are there any drool-worthy brown kitchens out there? Forget the builder specials with Home Depot faucets and the cheesy, ornate, faux-Tuscan Real Housewives kitchens that dominated the early aughts. (You know what I’m talking about: this and this.) What does the brown kitchen of today look like, if there even is such a thing?

It took some digging, but i’m seriously digging these:

Source: Hometalk

Source: Hometalk

Credit: Lauren Liess via Country Living

Credit: Lauren Liess via Country Living

Incidentally, I recently shot my dear friend Jamie’s brown kitchen for my book; I loved how she brought campaign-furniture styling to her kitchen and modernized the look with brass hardware and brass-trimmed tile. It’s very glam, no?

Behind the scenes at our shoot.

Behind the scenes at our shoot.

So. What makes these good brown kitchens different from the ones everyone loves to hate? How do you make sure you end up with a fresh, updated look? A few tips:

  • Mix light and dark. The dark woods in the above kitchens are paired with light subway tiles, pale walls, opalescent white glass light fixtures, and other elements that help brighten the space. 
     
  • Keep the hardware simple. Whether bar pulls, knobs, or bin pulls, the lines are streamlined and sort of utilitarian-looking, which gives them that understated, farmhouse vibe.
     
  • Elevate it with a smart mix of materials. In the “old” brown kitchen, all of the accents matched, typically in a dull finish of brushed stainless steel. The new version mixes stained and polished wood with metal, glass, marble, oiled bronze, polished chrome, and more. 
     
  • Choose walls and floor finishes that feel crisp and new. Whether it's powder-blue plaster or sleek tile floors, there's an element of modernity in all of these rooms.
     
  • Incorporate a hit of color. Be it in the paint, the accessories, or fresh greenery, there's something vibrant somewhere in the space.

With all of this in mind, I threw together a mockup to show my friend how she might keep the existing cabinets and still get the fresh, modern-vintage farmhouse style she described wanting in her home. Have a look.

Corinn Ryan Kitchen.jpg

What do think? Are you anti-brown cabinetry, or could you see it coming back into style?

Hearth Center: Our Marble Fireplace Plans

Due to the winter holidays, and the miraculous fact that we have no active construction projects in the house, my family has been spending a lot more time enjoying our sitting and living rooms lately.

Our parlor, in particular, was the center of our holiday universe. It’s where we hung the stockings and put the tree, and it’s the first room guests see when the arrive at our home. (Oh, and it’s where we stash the booze.)

IMG_8382.JPG

It’s a small but fantastic space, and we love how all the details have come together over time: the vintage chandelier, the Louis-Philippe mirror, the bronze-hued curtains that our kids use for games of hide-and-seek. Dressed with holiday greens, the room just makes me feel all warm and fuzzy, and not just because of the spiced rum.

IMG_8381.JPG

Come next winter, though, I’d LOVE to be able to add a roaring fire to the scene. That’s a tall order, and more complex than simply calling a chimney sweep to come spruce up an old fireplace that hasn’t been maintained.

First of all, neither of the original marble mantels in our house—one in the parlor, one in the bedroom directly above—has ever held a fire. From the home’s construction in 1860 until three years ago, when we upgraded the house’s heating and cooling systems, the “fireplaces” were essentially giant heating vents that distributed warm air throughout the house.

 Now that’s we’ve changed the HVAC system and run alternate ductwork throughout the house, these pretty surrounds and iron grates are just decorative.

Or, in the case of the bedroom mantel, they're unread-magazine storage. 

Or, in the case of the bedroom mantel, they're unread-magazine storage. 

To get crackling wood fires into these rooms, we’d have to prepare the chimney with masonry work, a stainless-steel liner, insulation, and flues—likely a five-figure expense. The alternative is to put in gas fireplaces, which will still require some chimney prep for insulation and venting, but it’ll be less extensive (and less expensive), so we’re going that route.

We’ve found a Vancouver-based company called Valor that makes gas fireplace inserts in an arched shape, like this:

I'm optimistic that these will fit within our mantels, but we’re still in the research phase and need to confirm. Then we have to purchase and have them installed. (Cha-ching!) So while we’re doing that, I’m just going to post some pics of fire-ready marble mantels similar to ours, and dream of the day when we, too, can toast ourselves (with heat AND bubbly) by a flickering hearth.

Enjoy the gorgeousness.

Image Credit: Robert Sanderson. Image via Ideal Home

Image Credit: Robert Sanderson. Image via Ideal Home

Design: Roman and Williams. Image via MyDomaine

Design: Roman and Williams. Image via MyDomaine

Credit: Lauren Kolyn via Apartment Therapy

Credit: Lauren Kolyn via Apartment Therapy

Source: Vogue Living via A Flippen Life

Source: Vogue Living via A Flippen Life

Why Throwing a Party is the Best Thing You Can Do for Your House

Mayhem. That's the best way I can think to describe my home life for the last three weeks. I’ve been riding a mounting wave of panic and chaos, culminating in hours of absolute madness last Saturday morning. People were running. People were yelling. There were cuts, and bruises, and heavy things being dragged across the floors. At one point people were wearing PROTECTIVE ARMOR.

And then…. a celebration.

Worth it. 

Worth it. 

You see, back in early April, my husband dropped me a line. An innocuous line: “Hey, honey! The folks at the Preservation Society are looking for houses for this year’s historic tour, and they asked if they could take a look at our place. That’d be fun, right?”  

Good lord, I thought. “It’s in September, right? Think we’ll have everything finished up by then?” I took a look around. Our petite patio had been half-excavated, and only a portion of the stone and brick had yet been replaced. We had a death-trap of a door leading out from our kitchen onto nothing—a safety hazard, to put it lightly. We hadn’t yet put up the balcony on the back of the house, or begun to design the railings and stairs that would lead down to the garden level. We had just swapped out our thermostats, leaving patches in need of spackle and paint in every room. Boxes of backsplash tile, bathroom wallpaper, and light fixtures were stacked in the hallways, waiting to be opened and dealt with. Rooms were full of furniture pieces I hadn't had time to replace.

We said yes. Because, number one, we are optimists. Number two, the event raises money for a really great organization that helps keep the history of our Boston neighborhood alive. But the third and most compelling reason was one I learned fairly early on in this renovation journey of ours: how important it is to have milestones along the way, and to give yourself reasons to celebrate your own hard work. It’s like buying yourself a new outfit when you're halfway to your weight-loss goal. You need to pause and appreciate how far you've come.

To that end, at several points in the past seven years of residential upgrades, we have sent invitations for parties that our under-construction home was in no way prepared to host. These deadlines gave us a reason to stop and declutter, to organize, to decorate what we did have, and to enjoy our space for one evening. For one blessed night, there would be no ladders to be seen, no drill bits on the dresser. We’d arrange flowers, light candles, get catering. It was always a scramble to tidy up, but it was always worth it.

This advice doesn’t just apply to renovators.  For anyone with a busy schedule and/or crazy little kid-monsters running around, it’s easy to just let things pile up in corners, or to say “What’s the point? We’re just going mess this up again.” It’s easy to put off hosting a grown-up get together because your home is “in transition.” I say: All the more reason to host a party.

Now, I’m not saying you MUST dress your house to have people over, or that you can’t have just invite your friends over for pizza amid the dust. You should do that. But when you take a bit of time to stage your own home so that you’re proud of it, you not only gift yourself with a few lovely weeks or months of not feeling like everything’s a mess, you also gain some perspective on what’s working and not working in your space. You can see what you actually have, and stop stressing about what you don’t. All you people pinning “dream house” pictures online while lamenting the fact that your space looks like crud? Maybe it doesn’t. Maybe you just need to invite all your friends over for cocktails, and spend two days rearranging your stuff so it looks nice. Maybe all you need to make your home feel welcoming is a new pillow or a new lamp, but you don’t know it because you’ve written off your current space off as a permanent mess. Why not give your house a chance to shine from time to time?

So… the house tour. We spent the last part of the summer marking off items on our gigantic punch list. We had our new fence built, joining forces with our neighbors who all wanted their fences replaced at the same time. We finally had the balcony installed, and we leaned on our stonemason to finish paving the patio. We ordered new furniture, a sectional that would make the space truly cozy.

Look, ma, no rails (yet).

Look, ma, no rails (yet).

Dave and I came up with our own design for the railings, and shortly after Labor Day, they went up, too.

When your husband geeks out with Google SketchUp.

When your husband geeks out with Google SketchUp.

Part of them, anyway.

It takes five (or more).

It takes five (or more).

As the day grew closer and we started to see our hard work coming together, Dave and I decided to turn House-Tour Day into Party Day, and we sent out invites to a bunch of the neighborhood parents in our kids’ classrooms to join us for cocktails after the tour. After all, why waste a clean house on a bunch of strangers?

The week before the tour, we combed through bins of old books, clothes, photos, and college notebooks, figuring out where we could consolidate and donate. We got rid of old kids’ toys, rusty paint cans, and catalogs. Dave touched up all of the walls and changed the window latches to brass. I had some vintage prints framed and hung in the hallways, hung art in our master bath, bought plants for the back patio, and put a new bistro set on our balcony.

Wee gallery wall.

Wee gallery wall.

It came down to the wire. Twenty-five minutes before tour guests began lining up outside our front door, tickets on hand, metalworkers were still scrambling to install the new railings on our new balcony stairs. A guy with a mask and blowtorch fused metal outside while I arranged flowers in the dining room.

The morning of the house tour.

The morning of the house tour.

The day was a smashing success. Over 600 ticket-holders came through the tour houses that day, and while house-sitters managed the crowd at my house, we got to spend a few hours snooping around other families’ quirky old abodes. After the visitors left, our kids ran circles around their suddenly spacious-seeming, clean bedrooms. In the evening, our friends filled the kitchen, drank cocktails under the patio string lights, and had a legitimate, ear-splitting dance party in the living room. I couldn’t have asked for a better reward.

Our gift for participating: A watercolor of our home.

Our gift for participating: A watercolor of our home.

My house is by no means finished yet. I still have a mud room that doesn't open to the outdoors. There's cracked plaster in the stairwells and skylight. There are closets we intend to build and fireplaces to restore. Heck, we want to bust through the ceiling and build a roof deck at some point way, way in the future.

But for now, I have a home I'm ready to push "pause" on and enjoy. The work we've done is looking its best. I love my home, and it's worth it to create that feeling every now and then, if only as an excuse to throw a dance party.