Unless you grew up in a FANCY house, were trained and certified as a decorating ninja, or read every page of every issue of Martha Stewart Living, there are some decorating secrets the average person never picks up. Like how to fold a fitted sheet, for example, or the life-changing sushi-roll technique for putting on a duvet. These are things that someone needs to let you in on.
As a former employee of the great Martha herself, I was lucky enough to learn the folded-sheet trick from a photo stylist on her team, and the sushi-roll secret was bestowed upon me by an episode of Meredith Vieira. (I was “sick” that day, I swear.) But it wasn’t until I was fussing with six fairly inexpensive curtain panels that just… wouldn’t… hang…. right…. that I discovered the mother of all decorating secrets.
Ahem.
Your curtains? They need to be trained.
As soon as I read this enlightened little fact, tucked away in a quiet corner of the World Wide Web, it was like someone had thrown back twelve layers of Belgian linen and dupioni silk and revealed the Great and Powerful Oz to me. PAY NO ATTENTION TO THE LIFE-HACKERS BEHIND THAT VERY USEFUL AND MONEY-SAVING ADVICE! shouted the curtain people from behind the blackout shades. CONTINUE PAYING $200 PER PANEL, OR YOU’LL NEVER BE HAPPY!
Indeed. (And by the way, I’ve never paid $200 for a curtain panel. Even if I’d wanted to.)
Here’s the secret, guys. While I won’t deny that really good fabric curtains, purchased in the right size for your window and hung at the proper height from great mounting hardware, can make a TON of difference in how your windows look, there’s another factor that separates ultra-nice drapes from the ones you buy in a two-pack at Bed Bath & Elsewhere. First, better-quality drapes are engineered to hang properly; they’re backed with a layer of lining, and frequently have small lead weights embedded along the bottom hem. The added weight keeps the folds in check and the pleats from going all wonky.
But part of it happens after they’re hung, I learned. This article showed me that pleats don’t just appear; they first have to be arranged. This one took it a step further, suggesting that you bind the arranged folds of fabric for a few days to set the pleats. Once set, you can open and close your curtains and the fabric will automatically default to the “trained” folds. It's like reverse Botox: You tell the wrinkles exactly where you want them to appear.
Want proof? Check out these faux-silk curtains right after I’d hung them. The fabric blew with every breeze; they flared out at the base in a sort of trapezoidal shape. It was time to start hacking.
The curtains before their training regimen.
Step 1: Adding pleats
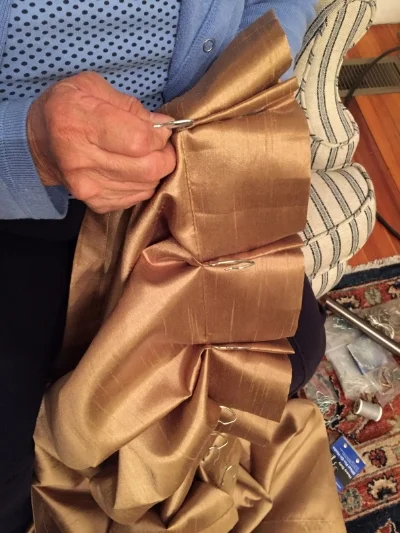
First I did what any resourceful home-decorator would do and waited for my mom to fly cross-country to visit. After letting her spend seven minutes with my children, I handed her my sewing bag and asked her to pinch-pleat the curtain tops. (“Six Dutch pleats per panel, Mom! You can see the kids when you finish them all.”) Pleating the tops was not a necessary step for great-looking curtains—hanging them from curtain clips would be just fine—but I’m an opportunist, so hey.
Thanks, ma.
Step 2: The weigh-in
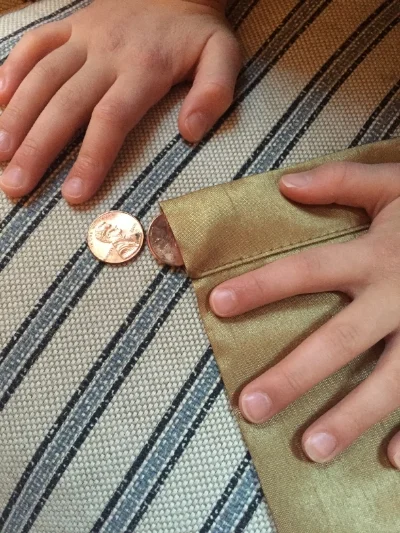
Next it was time to weight the curtains. This time I enlisted my 5-year-old daughter, whose hands you see here. While lead weights, either sewn into the bottom corners or all along the panel’s bottom edge, are the traditional method, I am 1) too lazy to go to the fabric store, 2) too impatient to wait for Amazon, 3) paranoid abour my children swallowing lead doodads, and 4) cheap. In lieu of drapery weights, I slipped six pennies into each corner of each panel. It worked like a charm and cost 12 cents per drape!
Wee helping hands.
If your curtains don’t have a slot like this, you can open the hem with a seam ripper, put our weights in, and follow the next step.
Step 3: Closing the gap
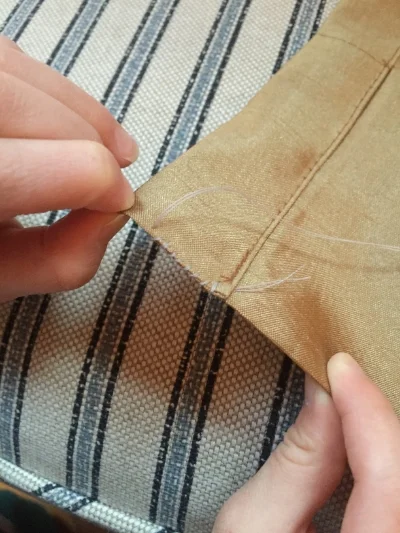
Once the “weights" were in, I tacked the curtain hem shut with a needle and thread. I used contrast-colored thread here so you could see my stitching. (Just kidding! I was too lazy to go to go out and buy gold thread, so gray it is!)
Tacked shut.
Step 4: Arranging the folds
My mom was nice enough to put the curtain hooks in for me, so next I hung the panels from the installed rods and hooks I began the training process. I pushed each panel as far to the side as I could, then ran my hands along the fabric to form six accordion-style pleats from top to bottom (one for each curtain hook, excluding the ones at the ends). I used a strip of scrap fabric to “belt” each panel into position, securing it with a safety pin.
Folded and bound.
Step 5: The training period
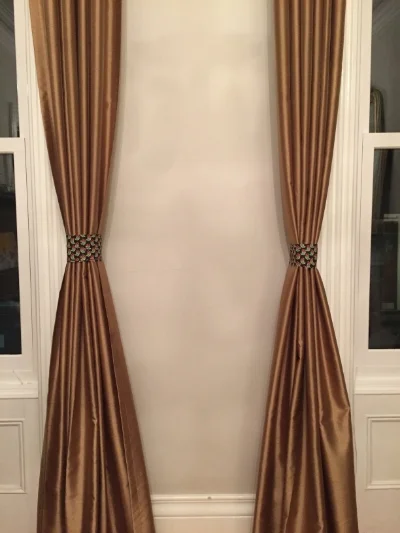
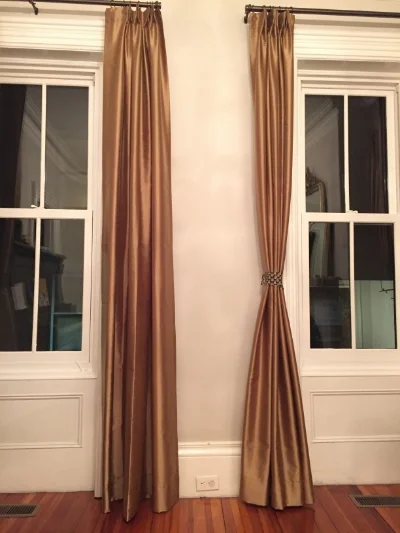
After three days in lockup, it was time to let the fabric loose. I removed the belt, smoothed the panels, and took this pic. Check out how much more tailored the one on the left looks now. One nice straight line, top to bottom. Ahhh.
Anyone have any other tips on making store-bought curtains look their best?

