Well, I did it: I bit the bullet and tiled my lovely new, top-o'-the-line kitchen with stick-on subway tiles.
Before you have a chance to type "WTF" in the comments section, let me recap the thought process leading up to this ill-advised move. I've spent the last few months living in the state of Indecision, USA regarding our kitchen walls—the full story is here—and even though I've come around to wall tile, I can't commit to another pricey project, as all our funds are being pumped into the back patio and deck right now. But once I made up my mind to tile, I couldn't bear looking at the bare walls any longer. Every time I walked into the kitchen, they yelled at me: "We're naked! The only thing you'll let us wear is spaghetti sauce! Don't make us suffer through tomorrow's Chicken Tikka Masala!" And I wanted to really KNOW, not just imagine, what tile will make the space look like.
Spoiler: It looks good. Really good.
Last Monday, I bought 6 packs of STICKTiles online and warned Dave. “Do you know what this weekend is?” I announced. “It’s PEEL AND STICK SUNDAY!”
Cue the side-eye. After killing our budget on a fancy range hood, commercial stove, and marble counters, I was going to put STICKERS all over the wall? Stickers that would likely peel off the paint job we had just paid for a few months ago?
Knowing I was not going to back down, and knowing the at the four-figure cost of real tile was the alternative, Dave took a step back. “Knock yourself out,” he sighed. If it looks great, we agreed, we’d leave it up until we’re ready for real tile. If it looked like ass, we’d just peel it off, sand and repaint, and cut our losses at a couple hundred bucks.


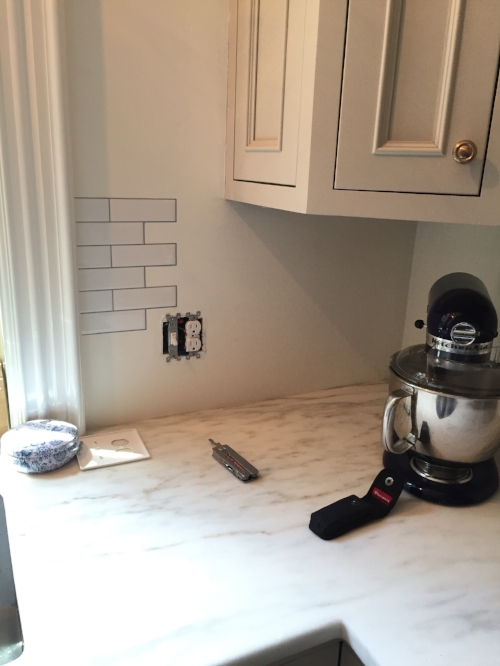
Bare walls before.
I got to work clearing the counters, cleaned the walls of dust and grime, and gathered my supplies: A sheet of cardboard to use as a cutting surface, a sharp utility knife, a large, clear ruler, a pencil and some painter’s tape. I unscrewed and removed all of the outlet plates as well.

My arsenal.
Starting at the window casing nearest the sink, I penciled a faint guideline along the top edge to ensure the tiles would be level and placed the first piece on the wall.
Faux tiles going up.
I worked my way toward the corner, overlapping the sheets of tile.

Because it’s an offset subway pattern, there were naturally lots of gaps in the field at corners and along the bottom. Whenever I cut an extra tile or a piece off a sheet for a corner or outlet, I set the excess aside to use later when filling in gaps.

Glad I saved this little guy!
After the first few tiles were up, I started to worry about a slight lean to the “grout” lines, and the pattern becoming off level by the time I reached the stove. I began tacking subsequent sheets into place temporarily with bits of tape before I actually stuck them to the wall, ensuring the pattern would land in the right place once everything had been adhered.
I continued the process on the right side of the stove. As each length of wall was finished, things looked better and better.

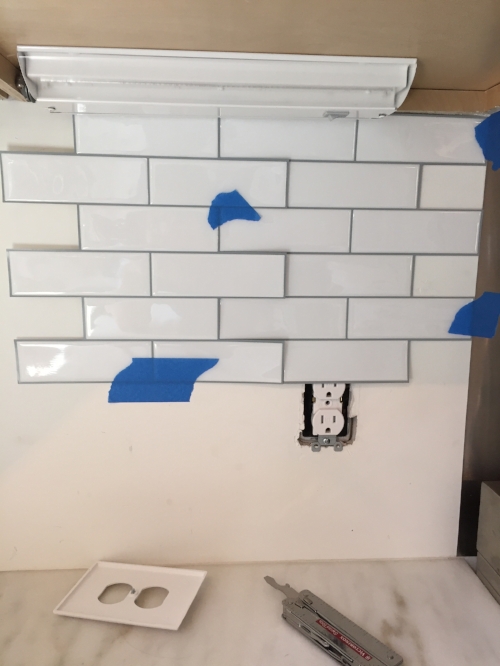
And that’s it! I have to say, aside from the slightly rubbery texture when you press hard on them, the fact that they lay flat instead of protruding at the wall, and the tiniest, nearly invisible lines where the tiles overlap, these things look extremely real. They finish the space and the shine adds some dimension. We’ll see how they hold up, especially since I disregarded the explicit instructions not to place tiles this close to the burners of my stove (#safety #meltingPVC #imminentdeath).

Yup, that was Sunday dinner. "Mommy's busy, kids! Go play!"

For now, I'm happy. Next year, when we put in the real stuff. I might go larger format, like this:

Source: Walker Zanger
Or square:

Source: Front + Main
I also I might extend tile to cover the whole sink wall, even around the door and window, like so:

Credit: Design by SuzAnn Kletzien, Image via HouseBeautiful
But that’s another idea I need to sell my husband on. Since I know he reads this blog, I’ll just leave these pics of gorgeous all-tiled kitchens right here. They’re SO GOOD.

Source: Cottage and Vine

Source: Better Homes and Gardens
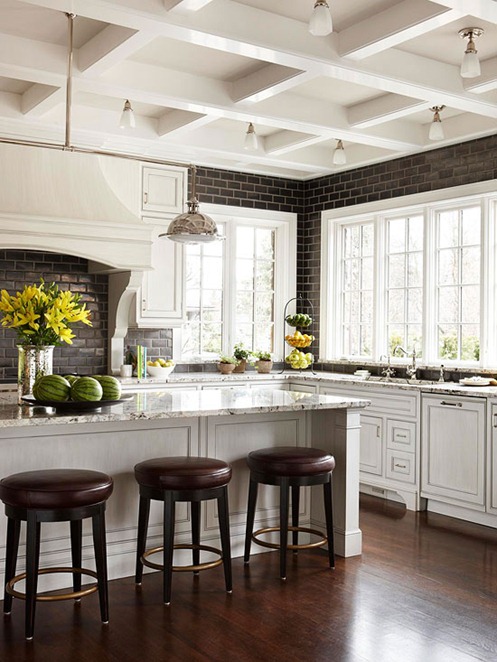
Source: Better Homes and Gardens
What about everyone else? Have you ever tried temporary tiles? Would you?